Likewise, you could also root your device via Magisk, with TWRP or without TWRP. But this is where things begin to get interesting. Once you install an app and grant it the superuser permission, then it straight away gets access to the system partition. It could then carry out administrative-level tasks. And this is where DM Verity comes to play. Since your device is now rooted, some potentially harmful apps might sneak into your device and spell trouble. As a result, Google has put into a place a stringent security mechanism called Device Mapper Verity. It prevents such apps from executing their tasks. While it is indeed a good move from the security point of view, yet it also restricts the app from performing its full functionalities. A rooted user already knows a thing or two about the apps that might spell trouble for their device and hence they wouldn’t install them in the first place. So rather than DM Verity straightaway blocking the functions of rooted apps, we believe it should be up to the end-user to act as per the request. And that is what we would be doing in this guide. We will show you how to disable DM Verity or Android Verified Boot (AVB) without using TWRP Recovery. This way you could easily install all the mods and tweaks on your device without any issues. So on that note, let’s get on with the guide.
[GUIDE] Flash ROMs/Magisk/TWRP/Kernels on A/B Partition DevicesHow to Flash Various Files in A/B Partition DevicesInstall Custom ROMs on any Android Device- Includes A/B PartitionHow to Fix FAILED (remote: unknown command) Error
Method 1: Disable DM Verity via Magisk
The first valid question that might come to your mind is why we went ahead with this method. After all, you could easily disable DM Verity just by flashing a couple of ZIP files via TWRP. So this question becomes all the more justified. Well, the thing is not every Android device comes with a TWRP Recovery. Furthermore, when one could easily root their device without TWRP and even Install OTA Updates in Rooted Android Device, why should we be dependent on TWRP for the aforementioned task. So for all the device owners that don’t have a working TWRP build or don’t wish to flash one, this method is all that is needed. Follow along for the complete instruction steps to disable DM Verity or Android Verified Boot (AVB) without using TWRP Recovery.
STEP 1: Get Stock Boot Image File
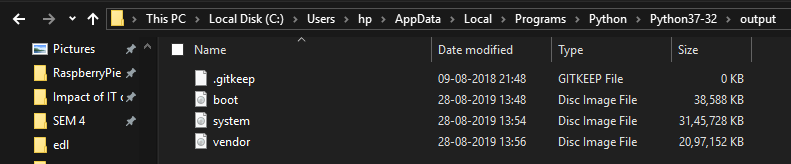
To begin with, you will have to get hold of the stock boot.img file. For that, download the stock firmware corresponding to your device and then extract the boot.img file from it. if the firmware is in ZIP format, you could easily extract it via WinZIP or WinRAR. In case, it is in OZIP format, then refer to our guide on How to Extract OZIP Realme and Oppo Stock ROM (Firmware). Likewise, if it’s in payload.bin format, then head over to the guide: How to Extract payload.bin and get the stock boot image file. If you have a Xiaomi device, then maybe its firmware would be in GZ format. So rename it to TGZ and use 7ZIP to extract it. We also have a boot.img file for a couple of devices, if it meets your requirement, then you could directly download it without the need for extraction. The first one is Poco X3 NFC: Download Poco X3 NFC Stock ROMs | Fastboot and Recovery. Next up, is the OnePlus Budget offering: Download OnePlus Nord Stock Boot Image Files [All Versions]. If you aren’t able to get the boot.img file, let us know in the comments, we will help you out. With that said, let’s proceed with the steps to disable DM Verity or Android Verified Boot (AVB) without using TWRP Recovery.
STEP 2: Install ADB | Enable Debugging
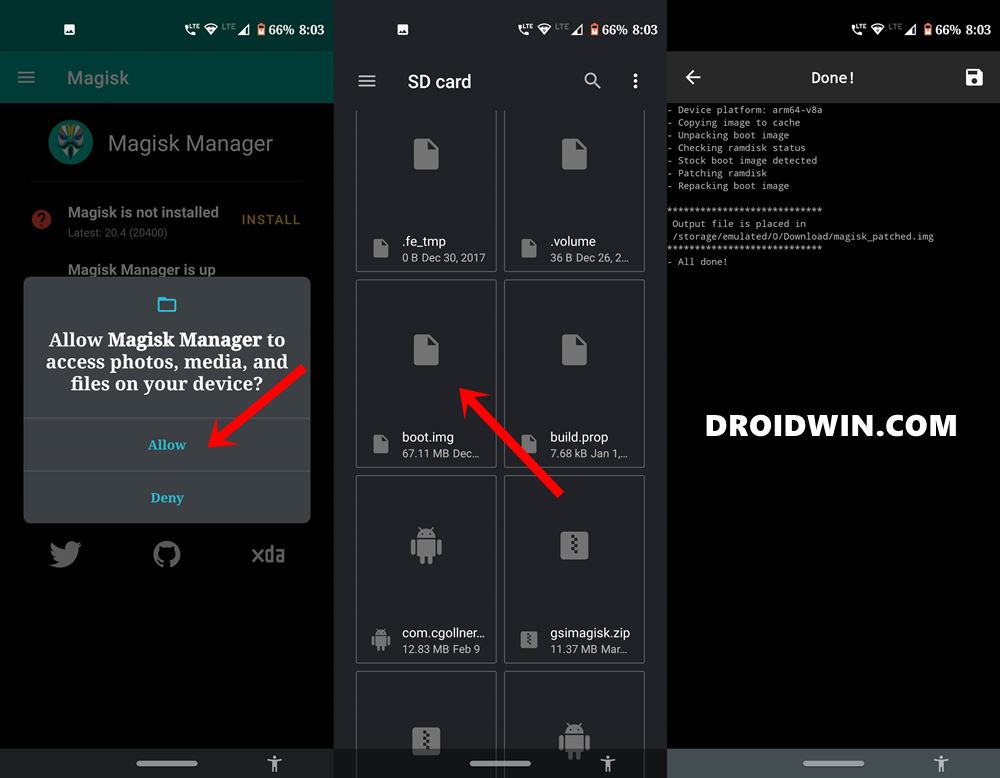
First off, you will have to install Android SDK Platform Tools on your PC. This will provide you with the necessary ADB and Fastboot binary files. After this, install Magisk Manager on your device. Along the same lines, we would request you enable USB Debugging as well. This will make your device recognizable by your PC in ADB mode.
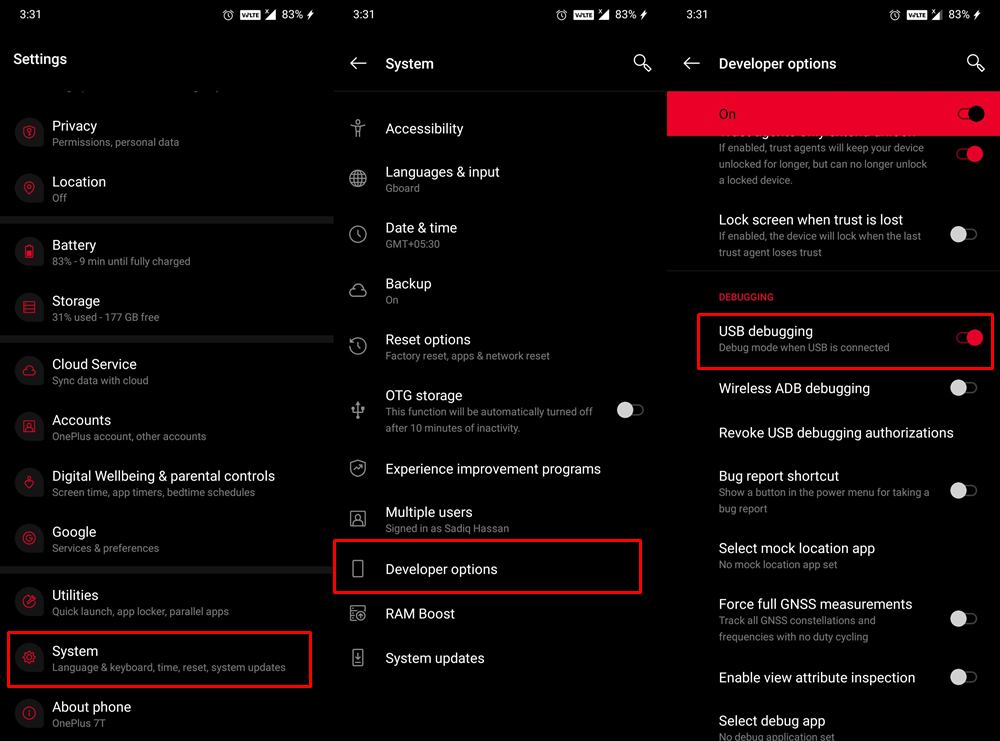
But why do we need ADB Mode? Well, it will be needed to boot your device to Fastboot Mode. After that, we would use this Fastboot Mode to flash a file. So head over to Settings > About Phone > Tap on Build Number 7 times > Go back to Settings > System > Advanced > Developer Options > Enable USB Debugging. [Don’t Miss: Enable USB Debugging on a Broken Android Device’s Screen? Here’s a Workaround].
How to Fix TWRP Error 20 GApps after flashing LineageOSFix Magisk Module Bootloop without TWRP RecoveryHow to Fix TWRP Error 70 [With Screenshots]How to Fix Error: Cannot load recovery.img
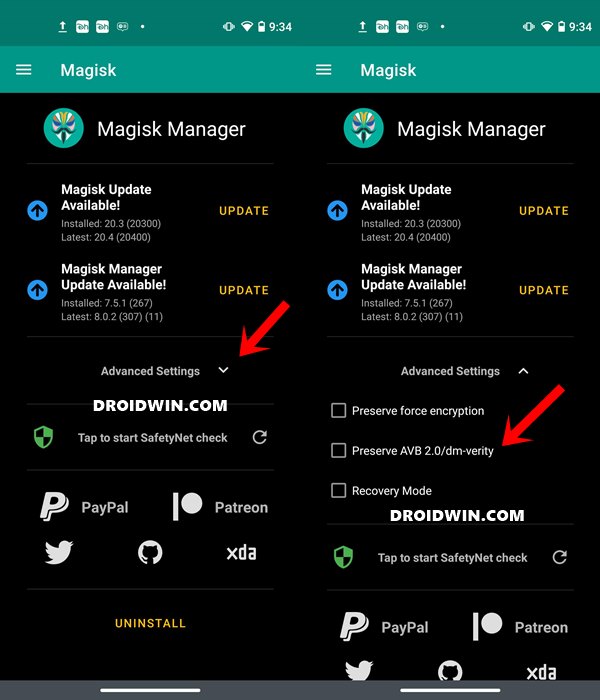
STEP 3: Disable Preserve AVB 2.0/dm-verity
STEP 4: Patch Stock Boot Image File
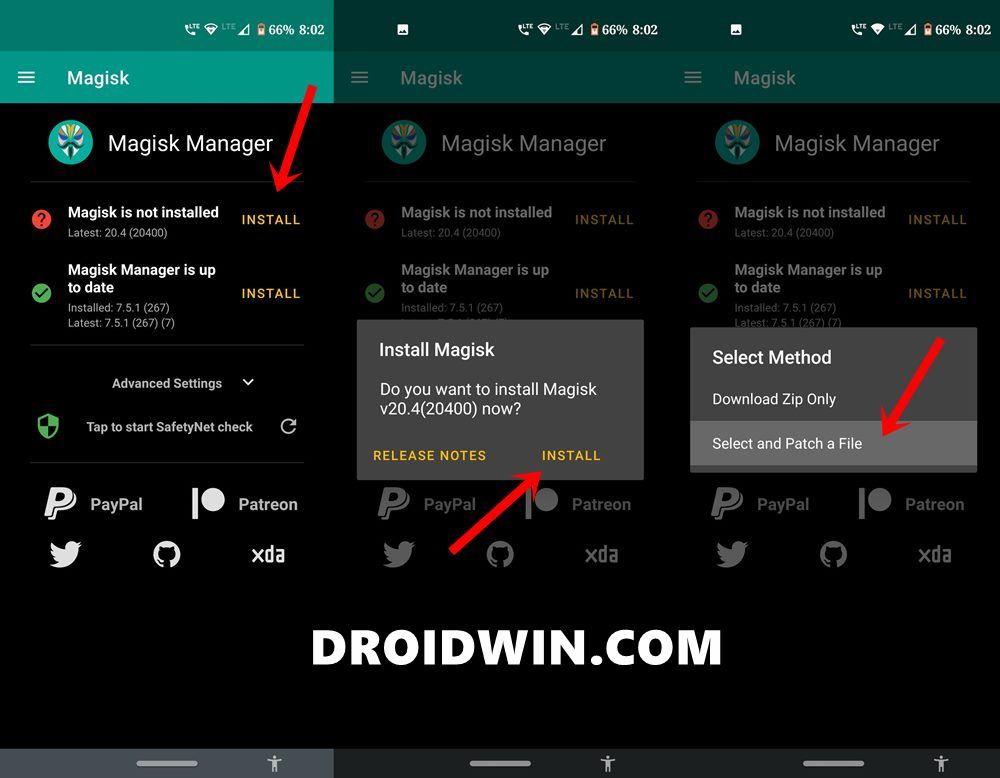
Next up, you will have to patch the stock boot.img file via Magisk. Here are the required instructions for the same:
STEP 5: Flash Patched Boot IMG File | Disable DM-Verity
Finally, you now have to flash this patched boot.img file via Fastboot Commands. Refer to the below steps to do so: With this, we conclude the guide on how to disable DM-Verity or Android Verified Boot (AVB) via Magisk. If you have any queries, do let us know in the comments section below.
Method 2: Disable DM Verity via Fastboot Commands
You could also disable the verity checks on your device by flashing the vbmeta (and in some cases, the vbmeta_system and vbmeta_vendor files as well). Here’s how it could be carried out. Droidwin and its members wouldn’t be held responsible in case of a thermonuclear war, your alarm doesn’t wake you up, or if anything happens to your device and data by performing the below steps.
STEP 1: Install Android SDK
First and foremost, you will have to install the Android SDK Platform Tools on your PC. This is the official ADB and Fastboot binary provided by Google and is the only recommended one. So download it and then extract it to any convenient location on your PC. Doing so will give you the platform-tools folder, which will be used throughout this guide.
STEP 2: Download and Extract Stock Firmware
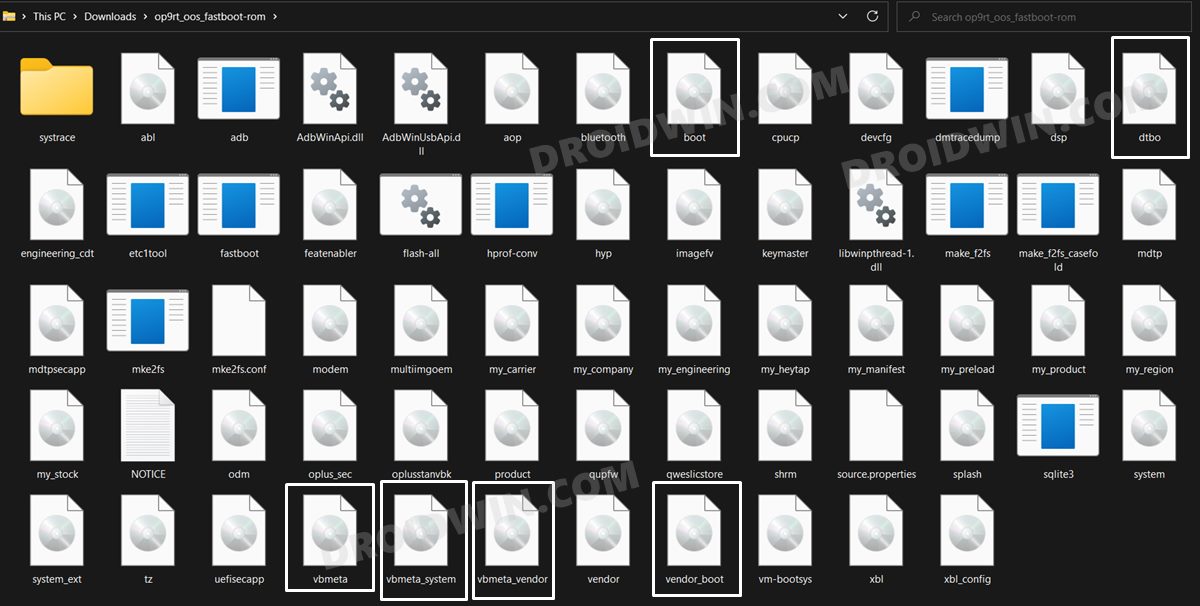
Next up, download the stock firmware for your device and extract it to any convenient location on your PC. Once the extraction is complete, transfer the below files to the platform-tools folder.
boot.img [compulsory]vbmeta.img [compulsory]dtbo.img [if present]vendor_boot.img [if present]vbmeta_system.img [if present]vbmeta_vendor.img [if present]
Do note that not every device has the dtbo.img, vendor_boot.img, vbmeta_system.img, and vbmeta_vendor.img, that is completely fine. However, your stock firmware should definitely have the boot.img and vbmeta.img files.
STEP 3: Enable USB Debugging and OEM Unlocking
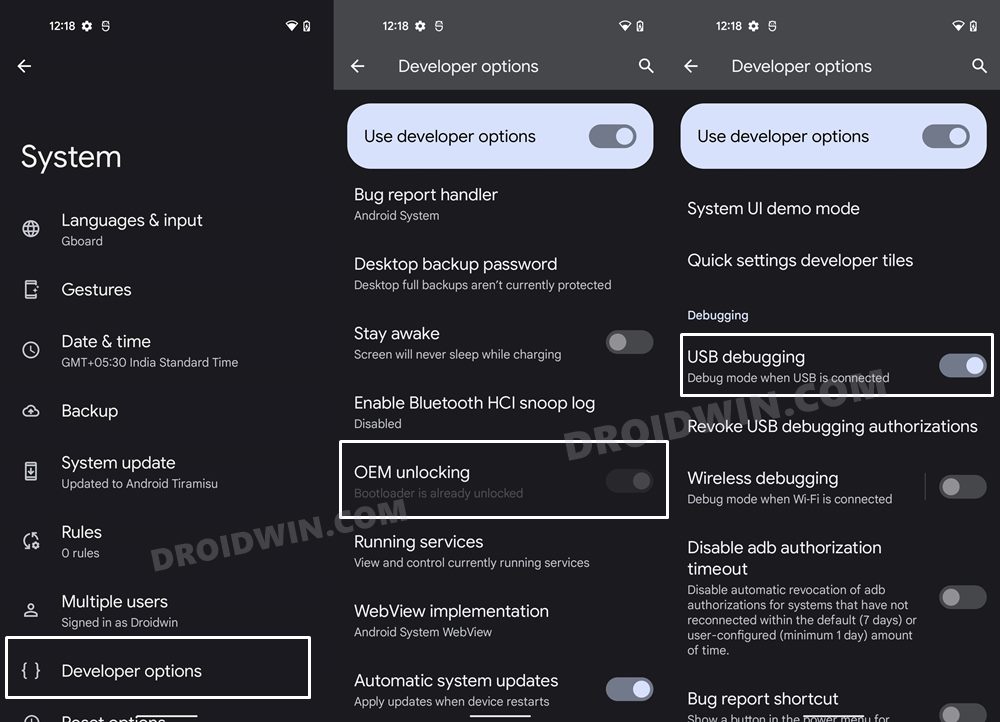
Next up, you will have to enable USB Debugging and OEM Unlocking on your device. The former will make your device recognizable by the PC in ADB mode. This will then allow you to boot your device to Fastboot Mode. On the other hand, OEM Unlocking is required to carry out the bootloader unlocking process.
So head over to Settings > About Phone > Tap on Build Number 7 times > Go back to Settings > System > Advanced > Developer Options > Enable USB Debugging and OEM Unlocking.
STEP 4: Unlock Bootloader
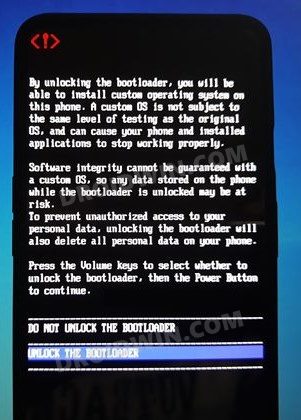
Next up, you will also have to unlock the device’s bootloader. Do keep in mind that doing so will wipe off all the data from your device and could nullify its warranty as well. So if that’s all well and good, then please refer to our detailed guide on How to Unlock the Bootloader on any Android Device.
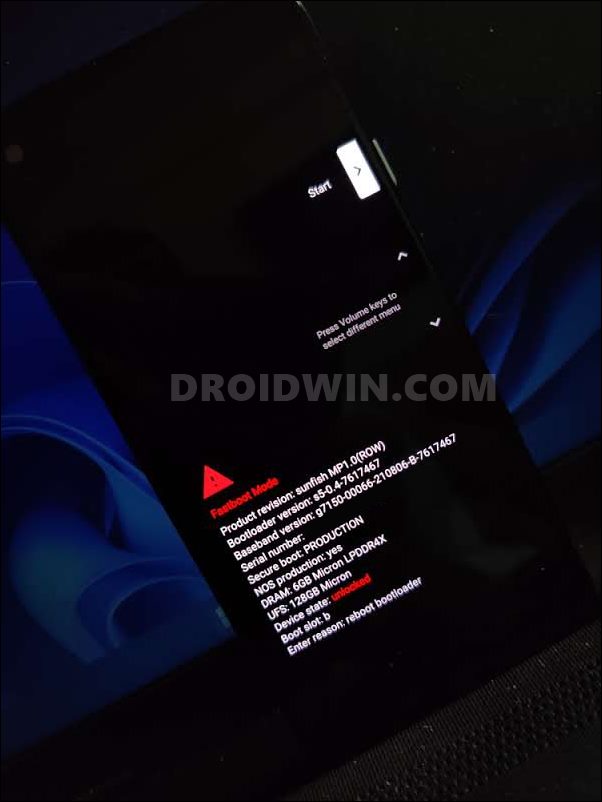
STEP 5: Boot Device to Fastboot Mode
STEP 6: Disable DM Verity Check via Fastboot
You may now disable the verity check by flashing the vbmeta (and vbmeta_system and vbmeta_vendor) files. So proceed with the below instructions to start the process: So these were the steps to disable DM-Verity or Android Verified Boot (AVB) via Fastboot Commands. If you have any queries concerning the aforementioned steps, do let us know in the comments. We will get back to you with a solution at the earliest.
Fix TWRP Error 7 (While Flashing Custom ROM via TWRP)How to Fix FAILED (remote: unknown command) ErrorHow to Permanently Install TWRP without TWRP ZIP File (only using TWRP.img file)Root Android Devices Without TWRP Recovery
About Chief Editor