However, this is what the OS has to offer. You always have the option to extract the maximum potential of your device by stepping into the realms of custom development. Be it for flashing Custom ROMs or installing a custom recovery like TWRP, the possibilities stand endless. Along the same lines, you could also gain administrative privileges and access to the system partition by rooting your device. And in this guide, we will help you with just that. Given here are the detailed instructions to root Samsung devices running One UI 4.0 Android 12 via Magisk. Follow along.
Downgrade Samsung One UI 4.0 to One UI 3.1 (Android 12 to 11) via OdinManually Install One UI 4.0 Beta Android 12 on SamsungOTA Download Link for Samsung One UI 4.0 Android 12 BetaGoogle Pay not working in One UI 4.0 Beta Android 12 [Fixed]
Benefits and Risks of Rooting
Once you root your device by flashing the Magisk patched boot.img via Fastboot Commands, you will be in a position to try out a plethora of customizations on your device. These include the likes of flashing custom ROMs, installing a custom recovery like TWRP, or flashing a custom kernel. Along the same lines, you could also flash Magisk Modules, Xposed Framework, Substratum Themes, Viper4Android, and the likes. However, this is just one side of the story. Carrying out this process also has its downsides. The first prerequisite in rooting calls for an unlocked bootloader. Doing so will wipe off all the data on your device and make the warranty null and void. Likewise, rooting will trip the Knox, and apps dependent on it might not function. Then the SafetyNet will be triggered, which might cause issues with banking apps [FIXED]. So if all that’s well and good, then let’s get started with the steps to root Samsung devices running One UI 4.0 Android 12 via Magisk.
How to Root Samsung One UI 4.0 Android 12 via Magisk
The below instructions are listed under separate sections for ease of understanding. Make sure to follow in the exact same sequence as mentioned below. Droidwin and its members wouldn’t be held responsible in case of a thermonuclear war, your alarm doesn’t wake you up, or if anything happens to your device and data by performing the below steps.
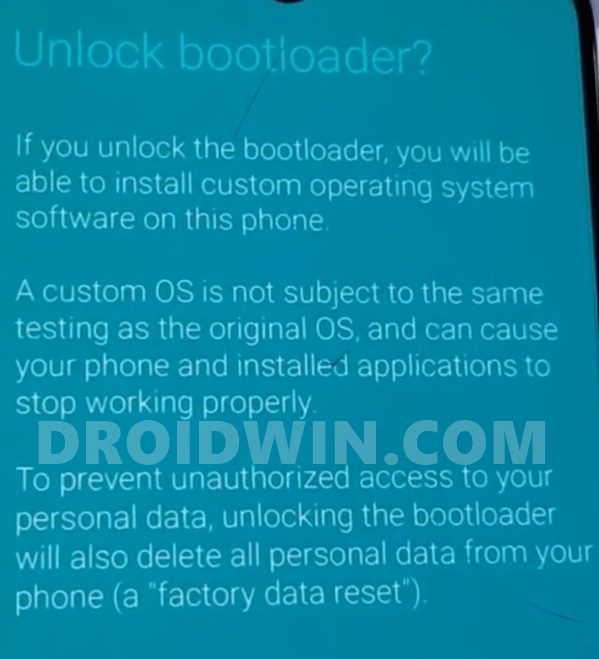
STEP 1: Unlock Bootloader
First and foremost, you will have to unlock the device’s bootloader. Please take a complete device backup beforehand and then refer to our guide on How to Unlock the Bootloader on any Samsung Device [New VaultKeeper Method]. In short, here’s what you need to do
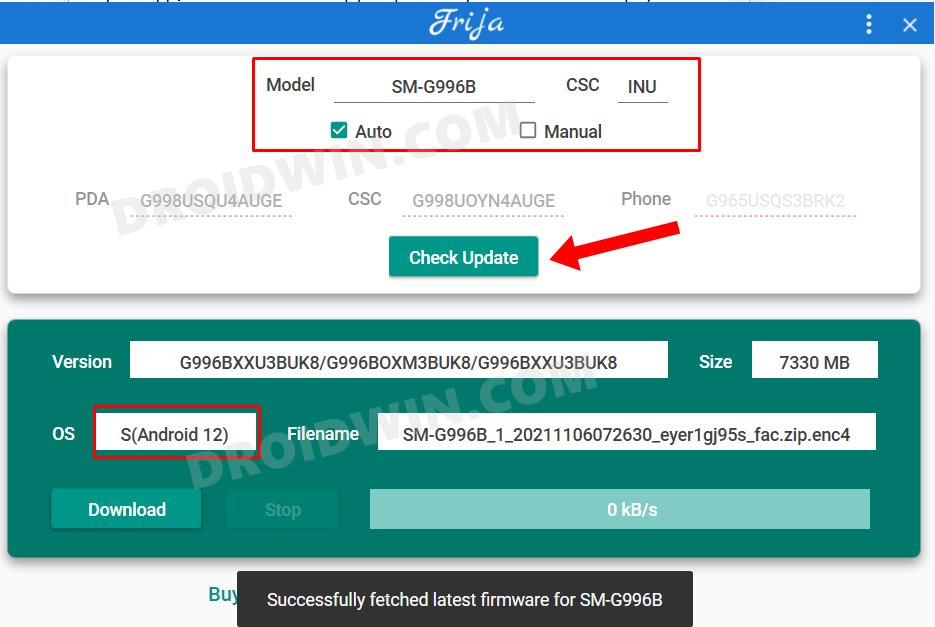
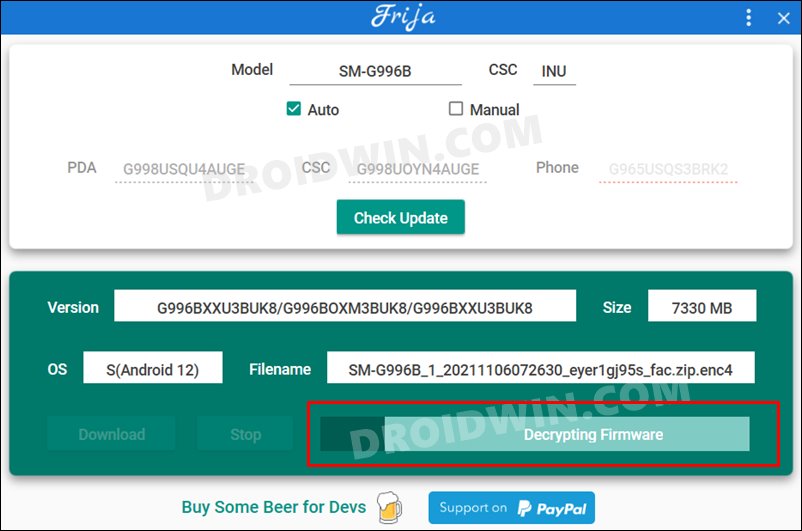
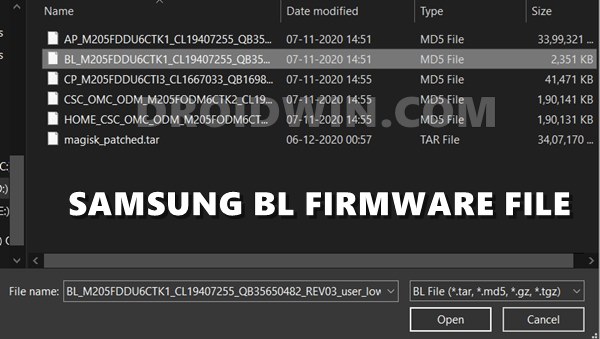
STEP 2: Download Samsung One UI 4.0 Stock Firmware
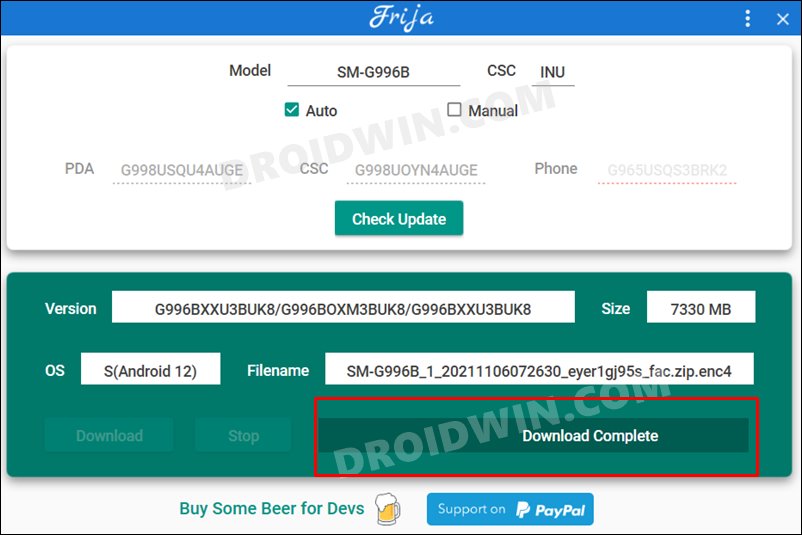
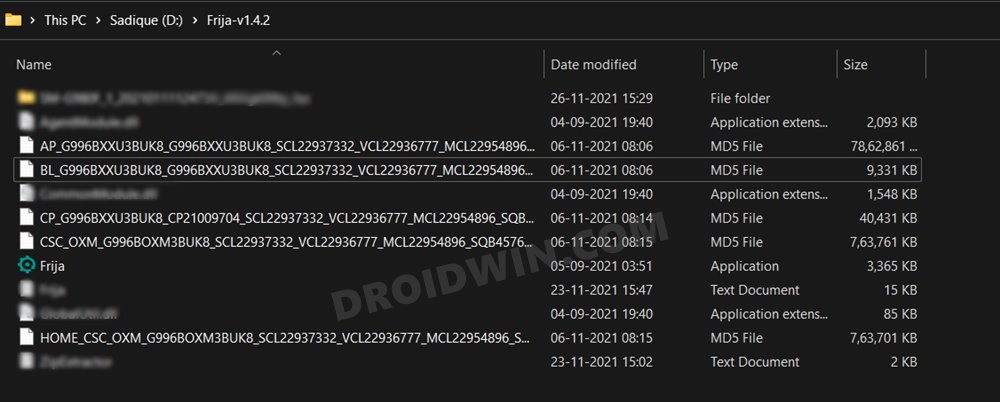
Next up, you will have to download the stock firmware for your device. There are quite a few ways of doing so. For example, you could use the Frija Tool, SamLoader Tool, or websites such as SamMobile. As for this guide, let’s proceed with the Frija Tool. So you may check out our comprehensive guide on How to Download Samsung Stock Firmware/ROM via Frija Tool. Or refer to the below instructions:
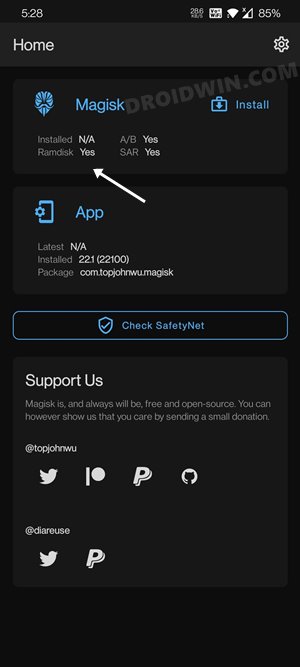
STEP 3: Install Magisk and Check Ramdisk
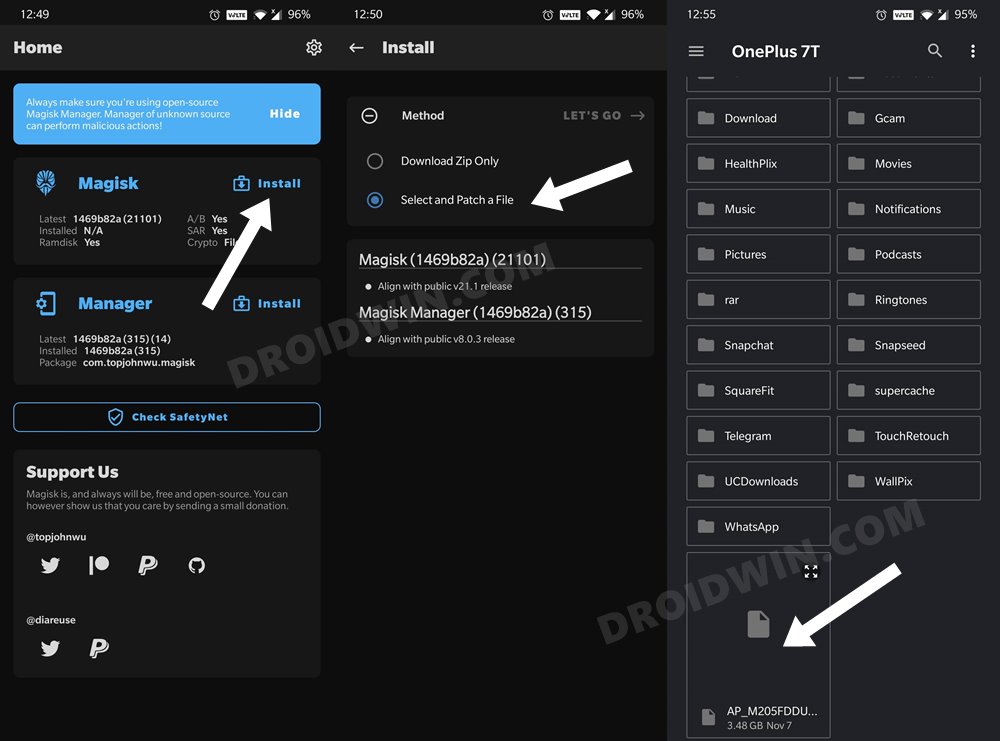
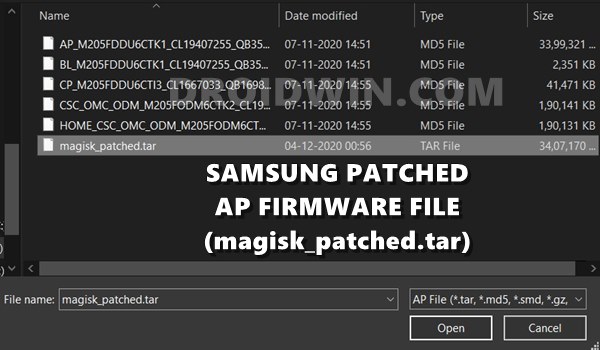
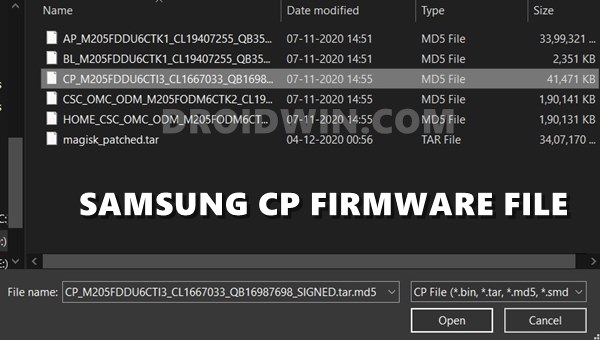
STEP 4: Patch Samsung AP File
We will now be patching the AP file via Magisk which will subsequently be flashed onto your Samsung device running One UI 4.0 Android 12 to root it. So either refer to our detailed guide on How to Patch Samsung AP Firmware via Magisk or check out the below direct instructions:
STEP 5: Send Patched AP TAR to PC via ADB Pull
You will now have to transfer this patched AP file to your PC. However, the normal USB method is known to cause some issues. Therefore, you should instead opt for the ADB Sideload method. Here’s how:
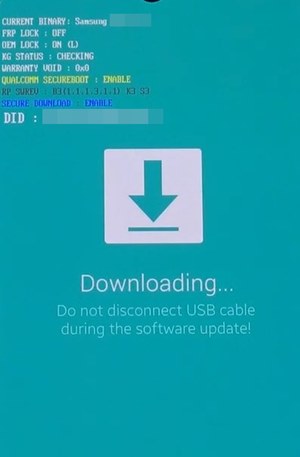
STEP 6: Boot your Samsung Device to Download Mode
You will now have to boot your S21 device to Download Mode so that Odin is able to identify it and carry out the flashing of the patched AP file. So refer to our guide to Boot any Samsung Device to Download Mode. Or refer to our below direct instructions:
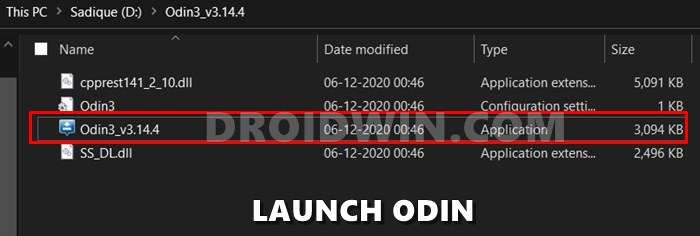
STEP 7: Install Odin
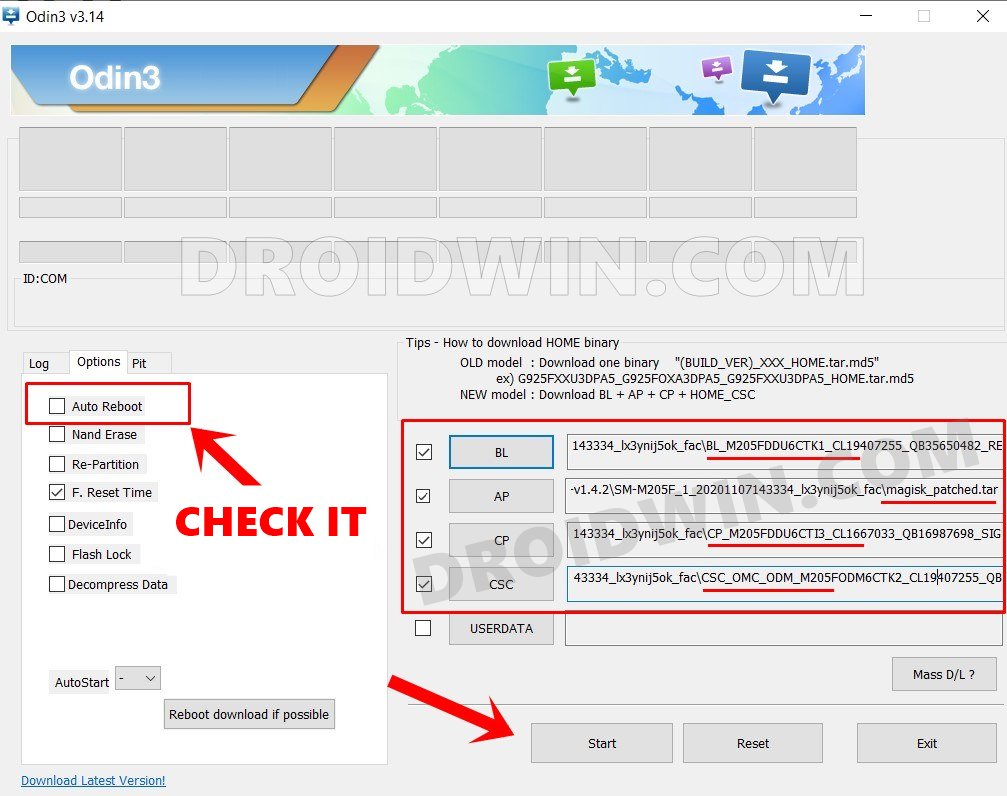
STEP 8: Flash Patched AP and Root Samsung One UI 4.0
STEP 9: Boot to Stock Recovery to Enable Magisk
Now if your device doesn’t have Ramdisk (see STEP 3), then you will have to boot your Samsung device to Recovery Mode in order to enable magisk. This is because, in the absence of Ramdisk, Magisk had no choice but to install itself in the Recovery partition. So you will now have to boot to the stock recovery.
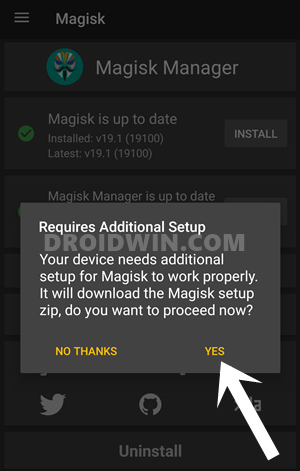
STEP 10: Complete Magisk Setup
So with this, we round off the guide on how you could root your Samsung device, running the latest One UI 4.0 based on Android 12, via Magisk. If you have any queries concerning the aforementioned steps, do let us know in the comments. We will get back to you with a solution at the earliest.
About Chief Editor