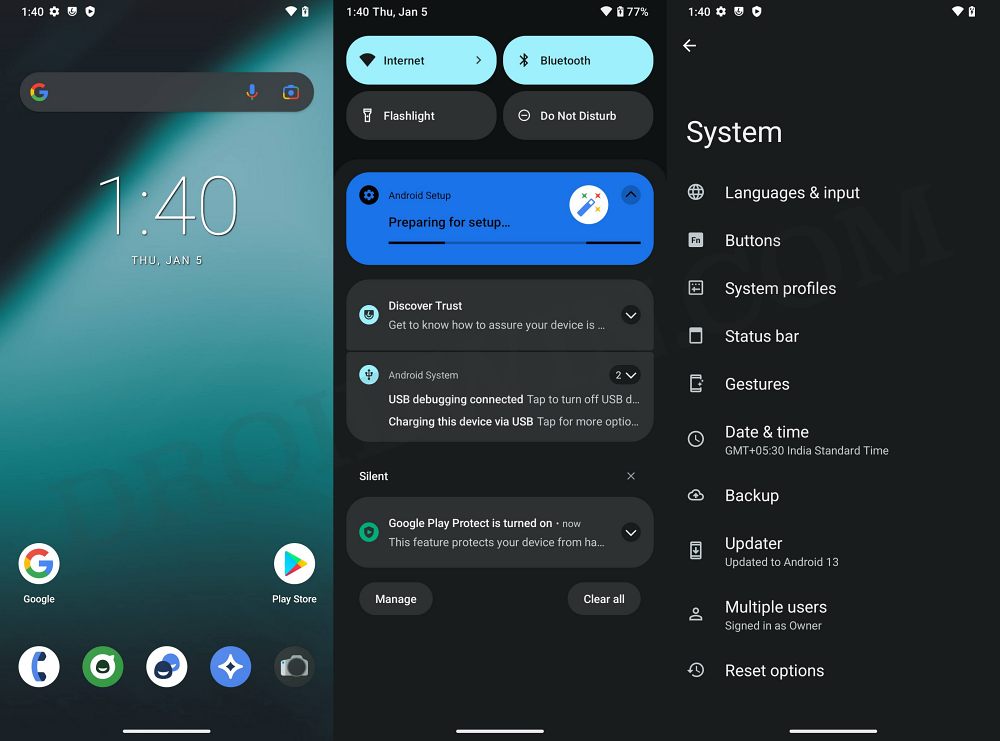
If you wish to take a stroll down the lanes of custom development, then you’ll be able to welcome the thirteenth iteration of the OS onto your device right away, all thanks to one of the most popular custom ROMs in the market. So without further ado, let’s get started with the steps to install LineageOS 20 based on Android 13 on Moto G 5G/Plus.
What is LineageOS ROM?
One of the oldest players in this domain, you could trace back the lineage of this ROM back to the days of CyanogenMod. Right from its inception to this date, it has stuck with its USP of providing you with just the required bit of crucial apps and services, without incorporating any additional bloatware apps. So while you wouldn’t get a plethora of features baked into the ROM, you are guaranteed a fluid and smooth usage experience.
To further cement this statement, the ROM doesn’t even come with any preinstalled Google Apps, Services, and Framework [although you could easily install them later on using the GApps package]. With this, you would have got a decent idea regarding this ROM, let’s now get started with the instructions to install the LineageOS 20 ROM based on Android 13 onto your Moto G 5G/Plus.
How to Install LineageOS Android 13 on Moto G 5G/Plus
Before starting with the process, make sure to take a complete device backup beforehand. Droidwin and its members wouldn’t be held responsible in case of a thermonuclear war, your alarm doesn’t wake you up, or if anything happens to your device and data by performing the below steps.
STEP 1: Install Android SDK
First and foremost, you will have to install the Android SDK Platform Tools on your PC. This is the official ADB and Fastboot binary provided by Google and is the only recommended one. So download it and then extract it to any convenient location on your PC. Doing so will give you the platform tools folder, which will be used throughout this guide.
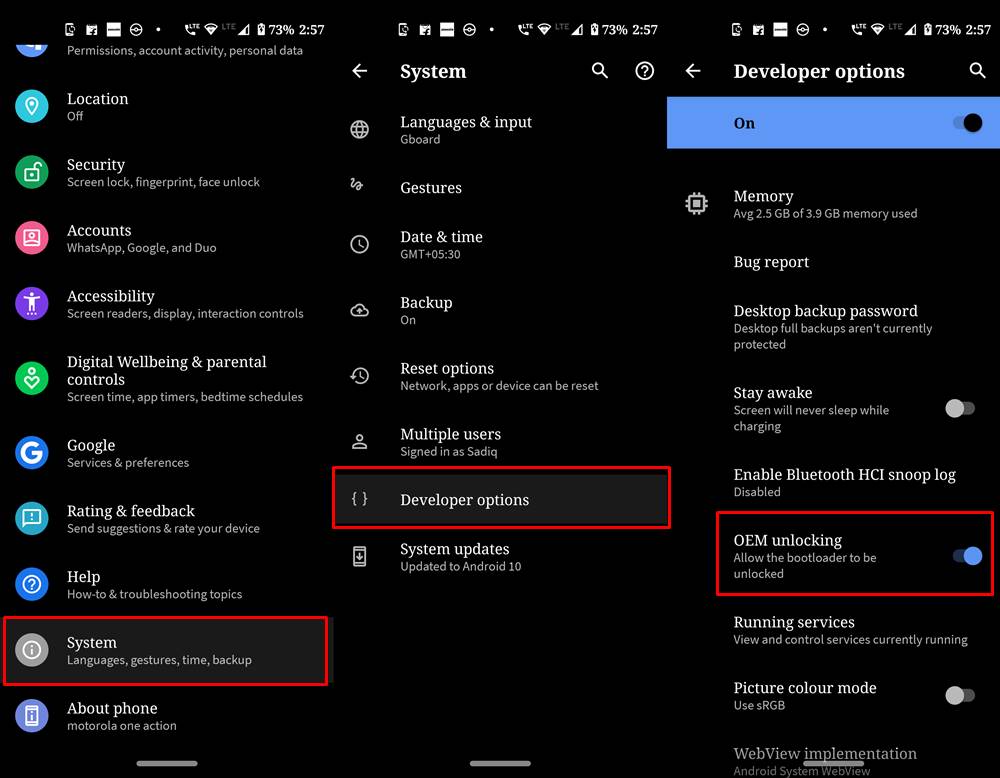
STEP 2: Enable USB Debugging and OEM Unlocking
Next up, you will have to enable USB Debugging and OEM Unlocking on your device. The former will make your device recognizable by the PC in ADB mode. This will then allow you to boot your device to Fastboot Mode. On the other hand, OEM Unlocking is required to carry out the bootloader unlocking process.
So head over to Settings > About Phone > Tap on Build Number 7 times > Go back to Settings > System > Advanced > Developer Options > Enable USB Debugging and OEM Unlocking.
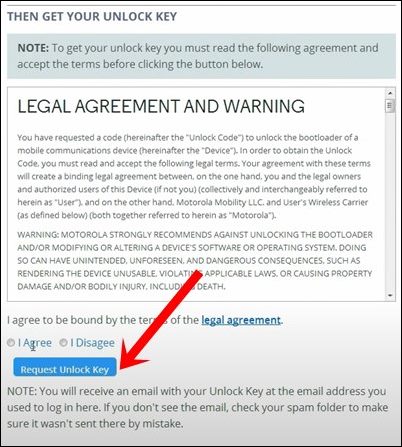
STEP 3: Unlock Bootloader
Next up, you will also have to unlock the device’s bootloader. Do keep in mind that doing so will wipe off all the data from your device and could nullify its warranty as well. So if that’s all well and good, then please refer to our detailed guide on How to Unlock Bootloader on any Motorola Device
STEP 4: Download LineageOS ROM, Recovery, GApps for Moto G 5G/Plus
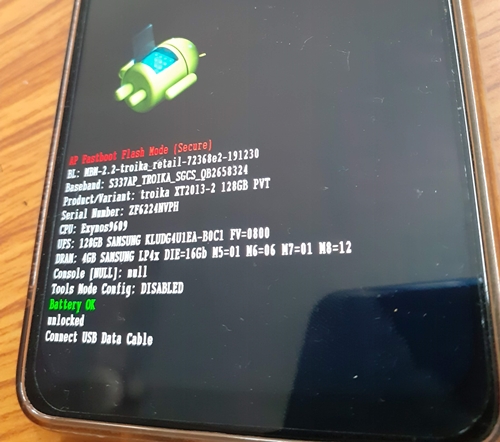
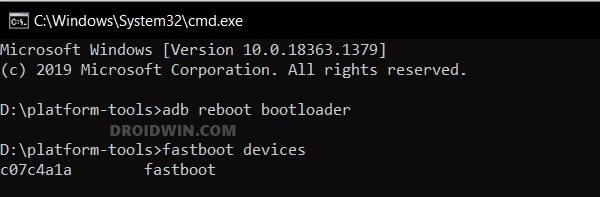
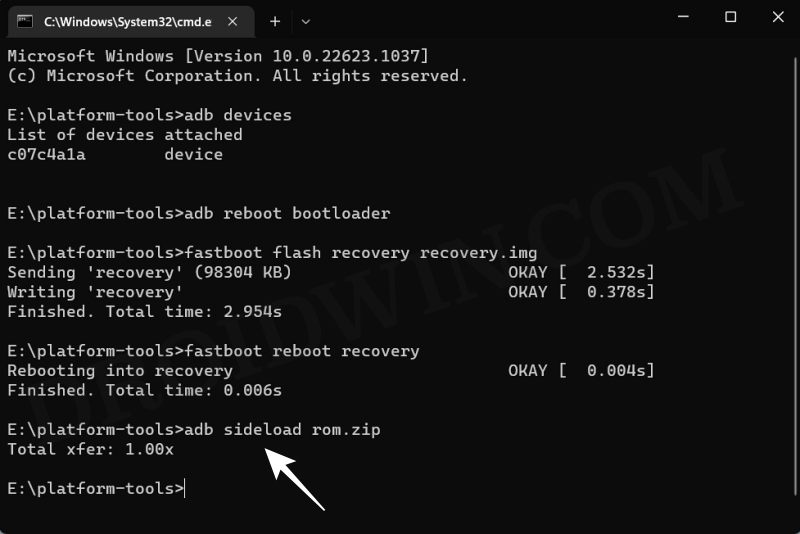
STEP 5: Boot to Fastboot Mode
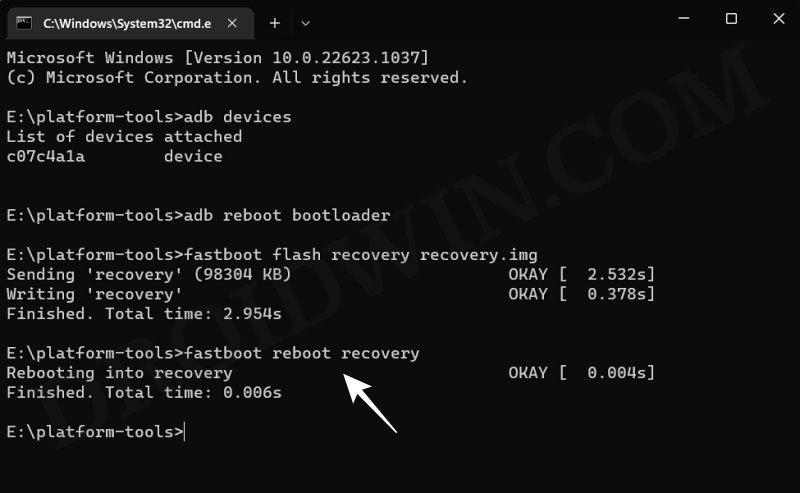
STEP 7: Flash LineageOS Recovery on Moto G 5G/Plus
STEP 8: Copy the Content of Slot A to Slot B In order to maintain consistency of the firmware versions between the two partitions on your device, we will now be copying all the contents of Slot A to Slot B.
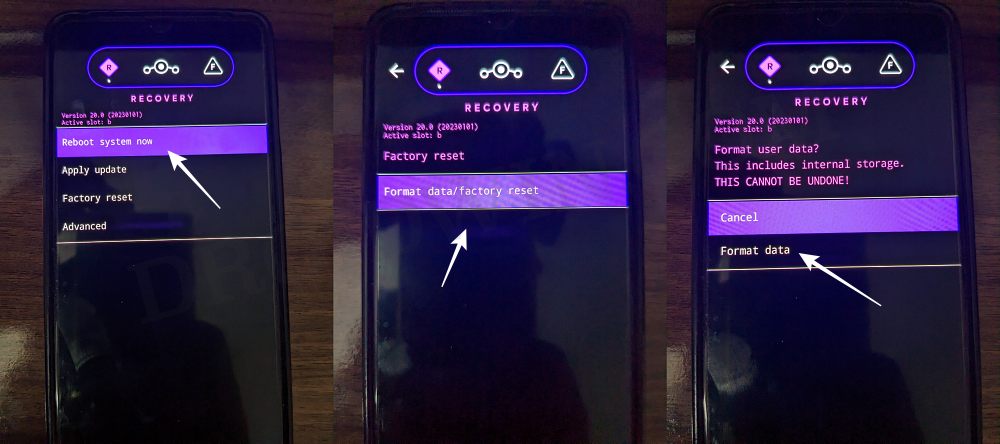
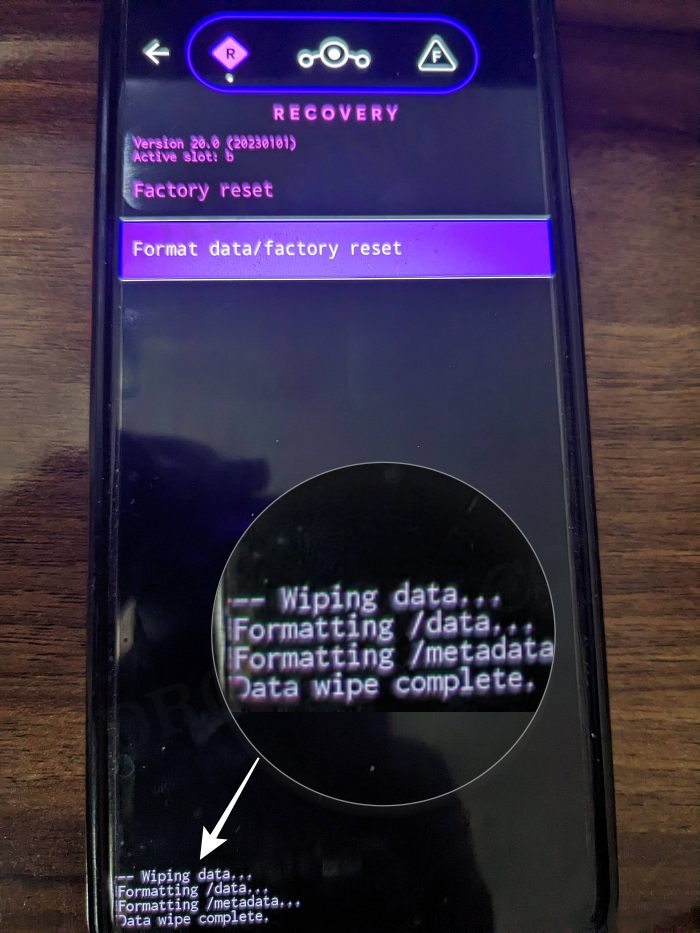
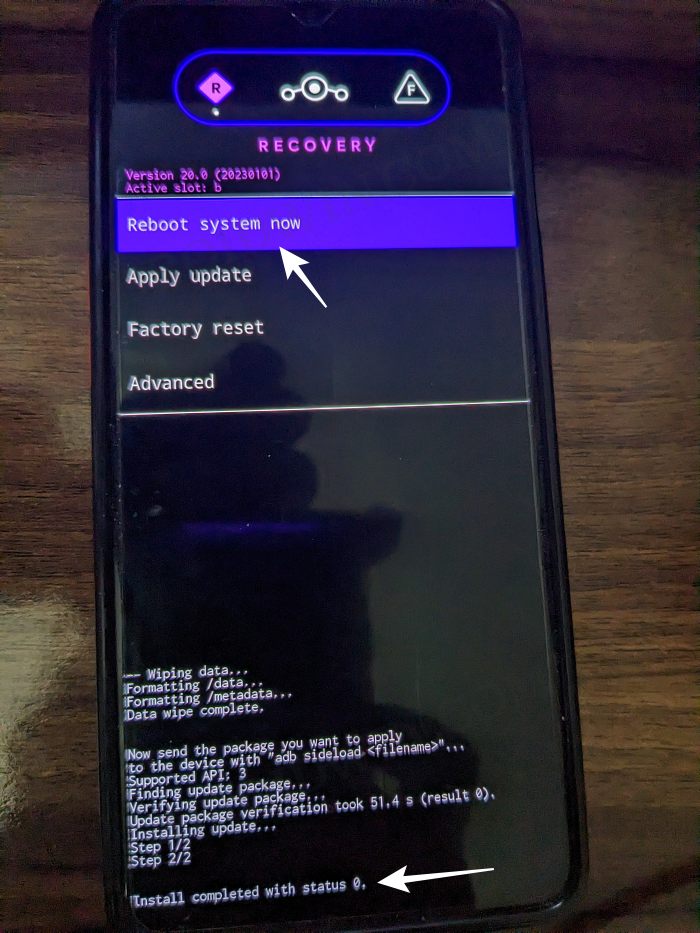
STEP 8: Factory Reset Device
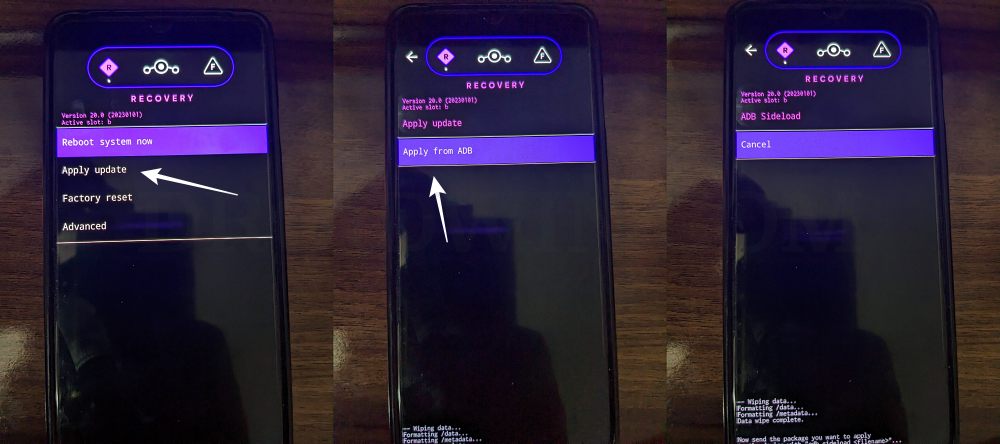
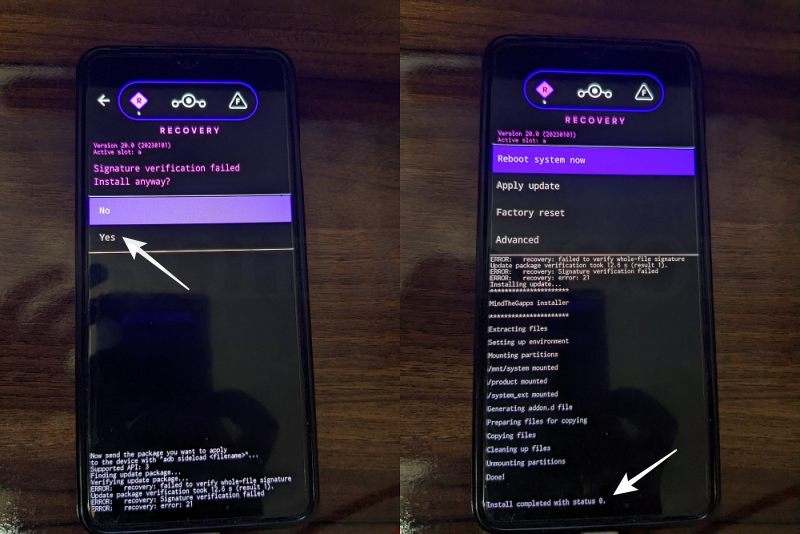
STEP 9: Install LineageOS Android 13 ROM on Moto G 5G/Plus
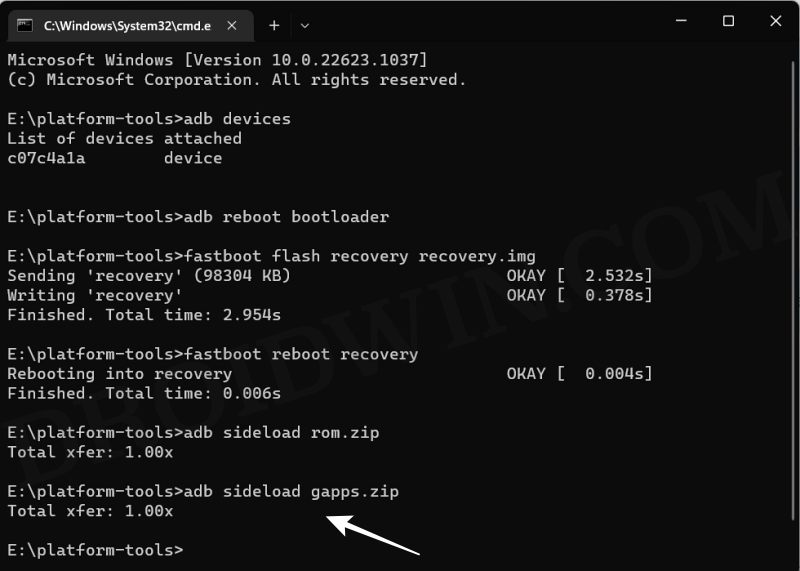
STEP 9: Install GApps
That’s it. These were the steps to install the LineageOS ROM based on Android 13 onto your Moto G 5G/Plus. If you have any queries concerning the aforementioned steps, do let us know your doubt and the device that you are using in the comments. We will get back to you with a solution at the earliest.
Android 13 Battery Drain Issue: How to Fix [10 Methods]Uninstall Updates missing for System Apps in Android 13: How to FixHow to access Android 13 Data and OBB folder & transfer files in themThird-Party/Sideloaded Apps crashing in Android 13: How to Fix
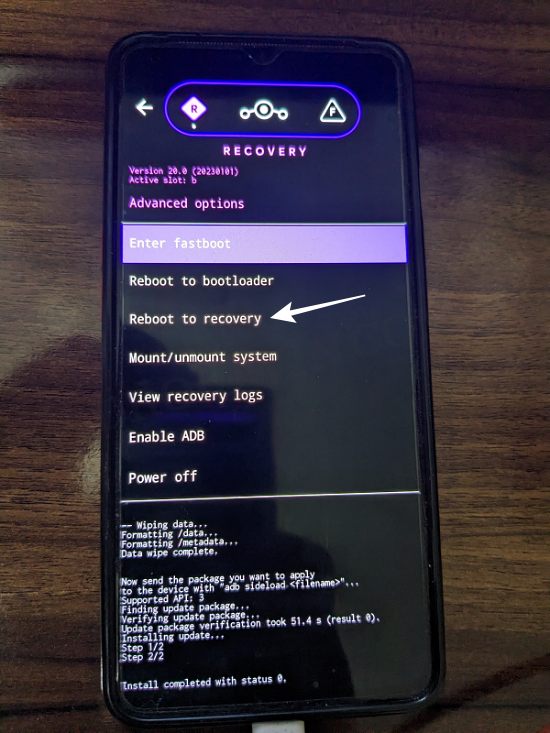
Fix: Error During ADB Sideload
If you get one of the below error messages, then it signifies a successful installation and you could reboot the device to the OS without any issues:
Total xfer: 1.00xadb: failed to read command: Success/No erroradb: failed to read command: No error(~47%) adb: failed to read the command: No erroradb: failed to read command: Undefined error: 0
About Chief Editor