Ported directly from Pixel 4A, this is a Generic System Image that you could flash directly on your device and in turn welcome a clean stock OS experience, bereft of tons of unnecessary bloatware that One UI has to offer. So without any further ado, let’s get started with the instructions to install the Pixel GSI ROM onto your Samsung Galaxy A71. Follow along.
Install Pixel GSI ROM on Samsung Galaxy A71
The below instructions are listed under separate sections for ease of understanding. Make sure to follow the same sequence as mentioned. Droidwin and its members wouldn’t be held responsible in case of a thermonuclear war, your alarm doesn’t wake you up, or if anything happens to your device and data by performing the below steps.
STEP 1: Unlock the Bootloader on Galaxy A71
First and foremost, you will have to unlock the bootloader on your device. For that, you may refer to our comprehensive guide on Unlock Bootloader on Samsung Galaxy Devices. Once the process is complete and your device boots up, don’t restore the data yet, as your device will again have to go for a wipe in the subsequent step.
STEP 2: Boot Samsung Galaxy A71 to Download Mode
You will have to boot your device to Download Mode so that you are able to flash the required mods. So either refer to our detailed guide on How to Boot any Samsung Device to Download Mode or refer to the below shorter instructions:
STEP 3: Install Odin
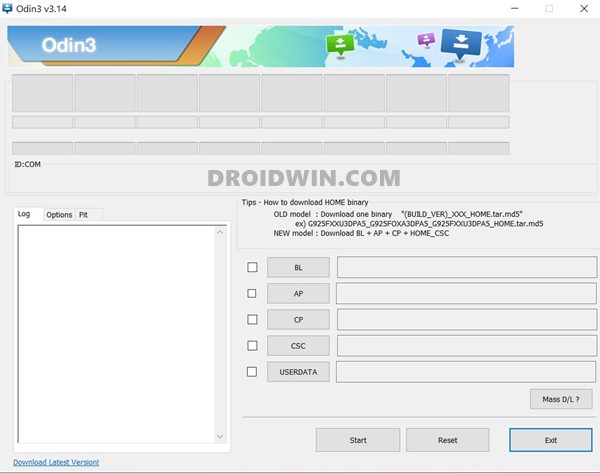
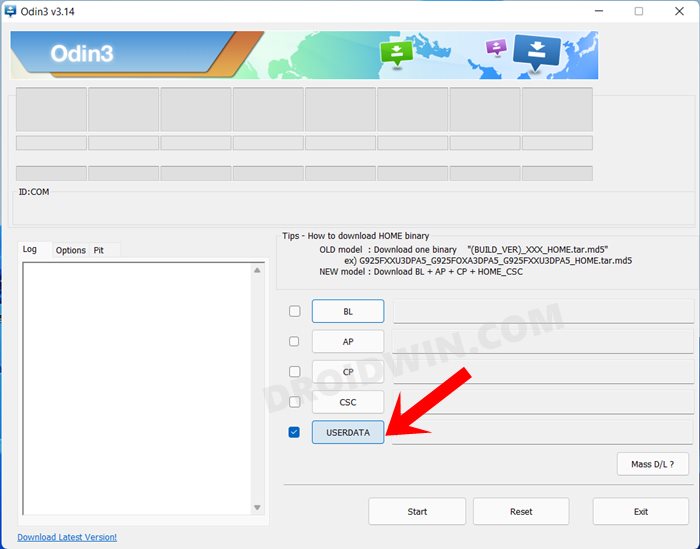
Next up, you will have to download and install the Odin Tool onto your PC. This is needed to flash the TWRP and to disable AVB on your device. So get hold of the latest Odin from here: Download: Odin3-v3.14.4.zip. Once downloaded, extract it to any convenient location on your PC.
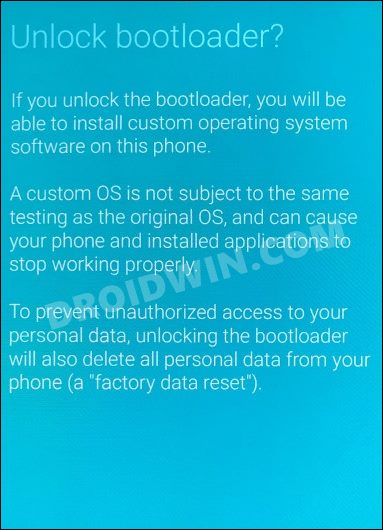
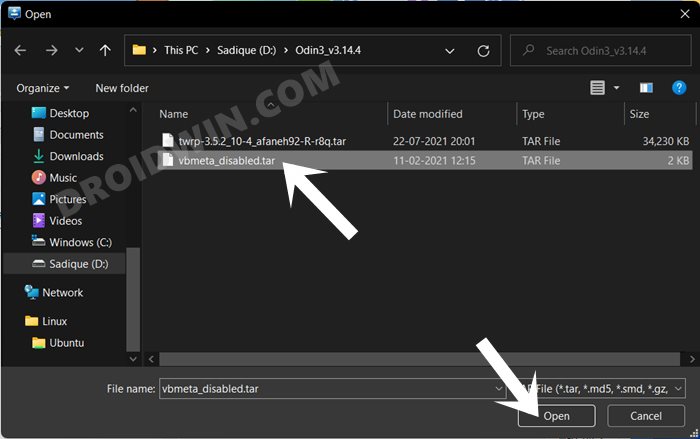
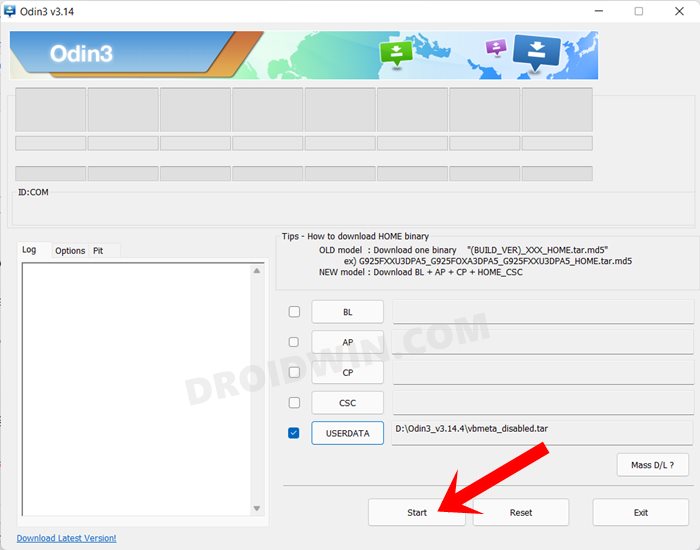
STEP 4: Disable Android Verified Boot on Samsung Galaxy A71
Next up, you will have to disable AVB on your device which would then allow you to flash the desired custom binary (in this case, TWRP and Magisk). Your device will now undergo a reset and then, the AVB stands disabled. You may now proceed ahead to install the TWRP Recovery and root Samsung Galaxy A71.
STEP 5: Download TWRP Recovery for Samsung Galaxy A71
You could now grab the latest custom recovery for your device from the below link. Credits: XDA Senior Member afaneh92
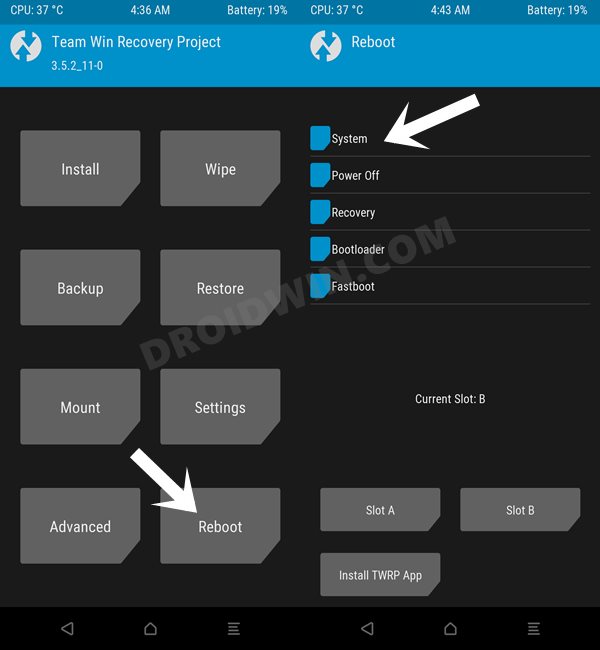
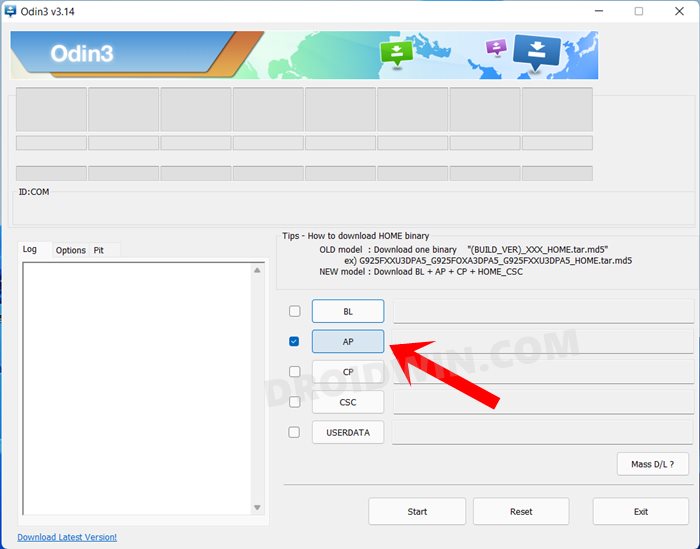
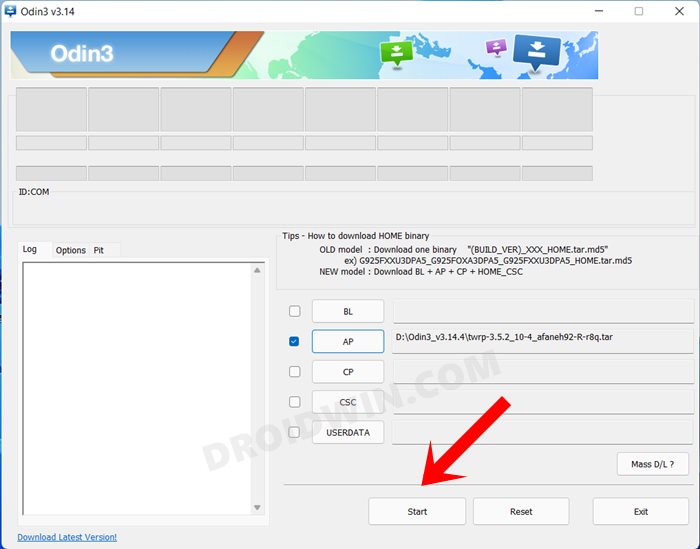
STEP 6: Install TWRP Recovery on Samsung Galaxy A71
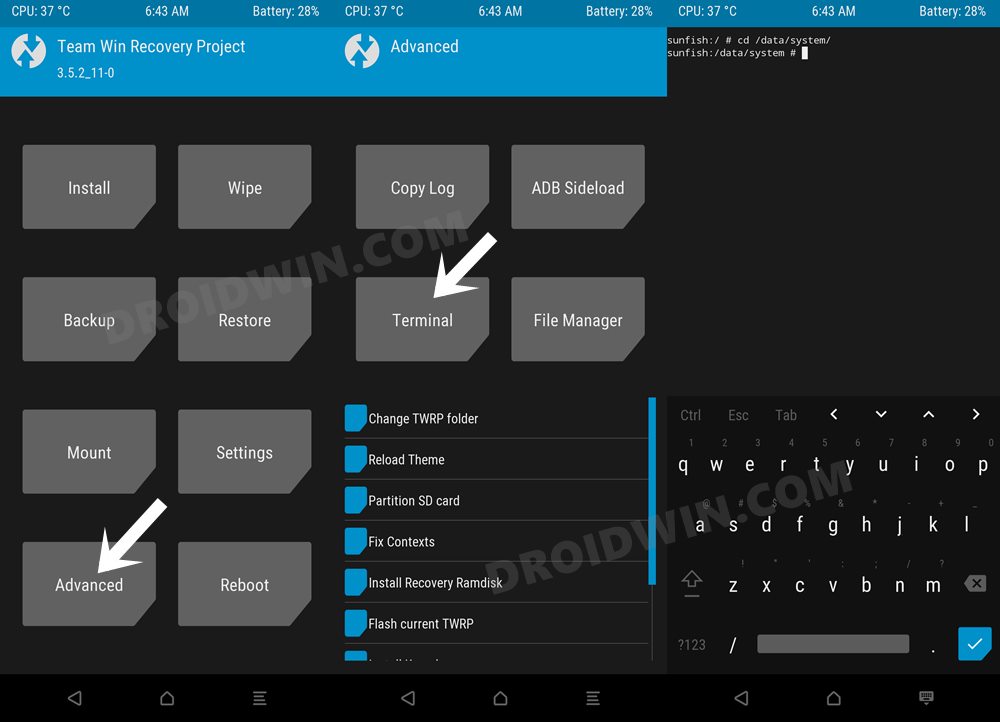
STEP 7: Disable Encryption on Galaxy A71 via TWRP
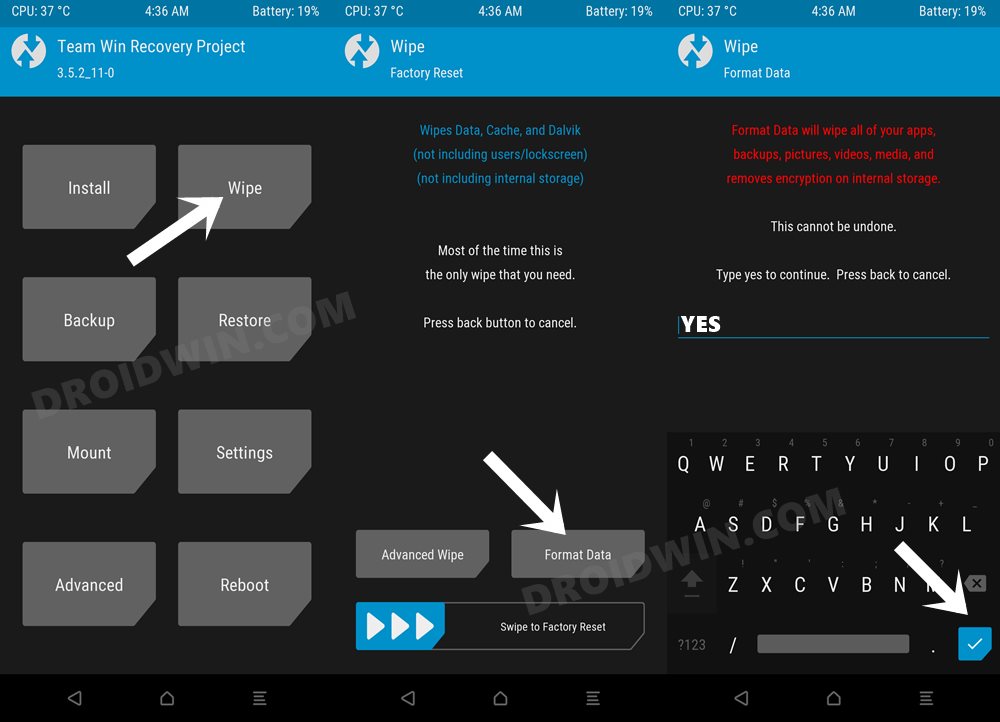
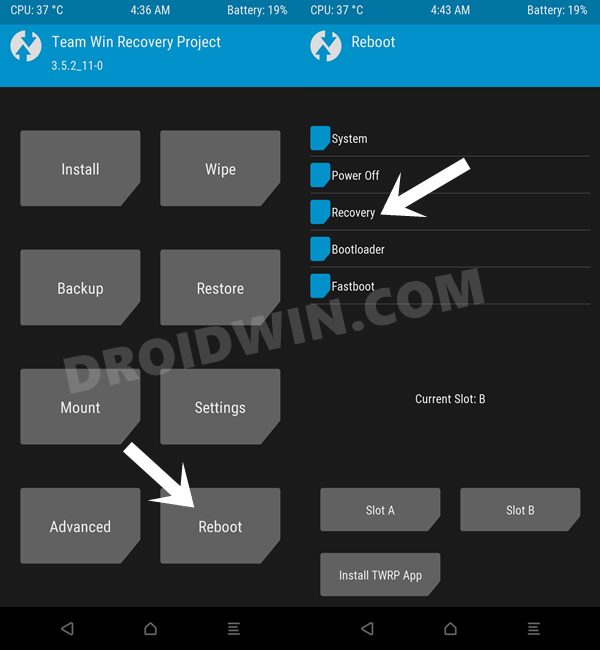
STEP 8: Install Pixel GSI ROM on Galaxy A71
That’s it. These were the steps to install the Pixel GSI ROM onto your Samsung Galaxy A71. If you have any queries concerning the aforementioned steps, do let us know in the comments section. We will get back to you with a solution at the earliest.
How to Enable Band Selection Mode in Samsung [2 Methods]Enable 120Hz Refresh Rate in Power Saving Mode in Samsung One UI 4Enable 120Hz Refresh Rate in Snapchat, Instagram, GCam CameraHow to Understand Samsung Firmware Version Number
About Chief Editor


![]()